I’ve been busy checking off some outstanding DIY projects from my massive Wish List lately and DAMN! it feels good.
Not only has it been nice to be able to focus on a task for longer than 5 minutes (thanks to pandemic brain fog), but it’s also been nice to feel like I’m actually in control of something in my life right now.
This is a super quick & easy project to do and it’s also a fantastic way to feel an immediate sense of accomplishment!
THE “BEFORE” BOWL – NICE BUT KINDA “BLAH”
The Hubs & I have lived in our modern farmhouse for almost 3 years now and I think I’ve been on the hunt for the perfect little fruit bowl ever since we moved in.
As usual, I have something very specific in mind but can’t seem to find it anywhere I look. Our kitchen is small (but mighty!) and I don’t want anything to “weigh” it down by having something “heavy” looking on the kitchen island.
I love wooden fruit bowls but that’s exactly what I mean by something looking “heavy.” I want something that’s “there, but not there,” if you get what I mean.
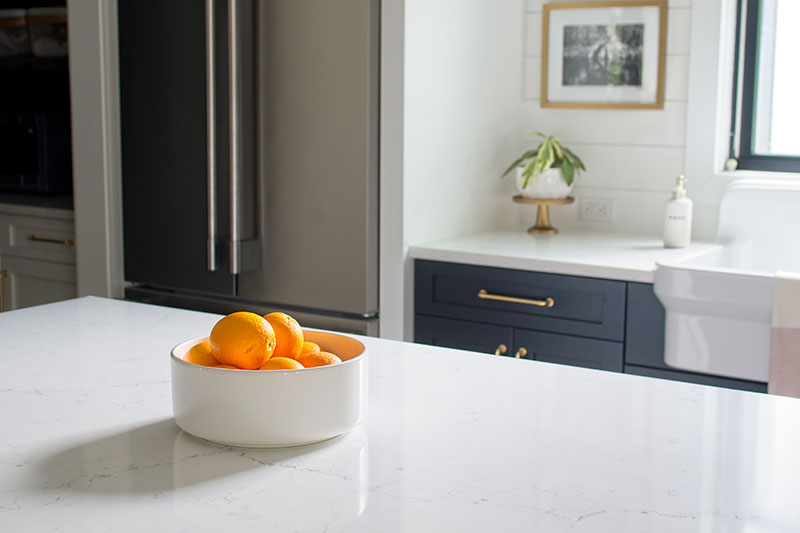
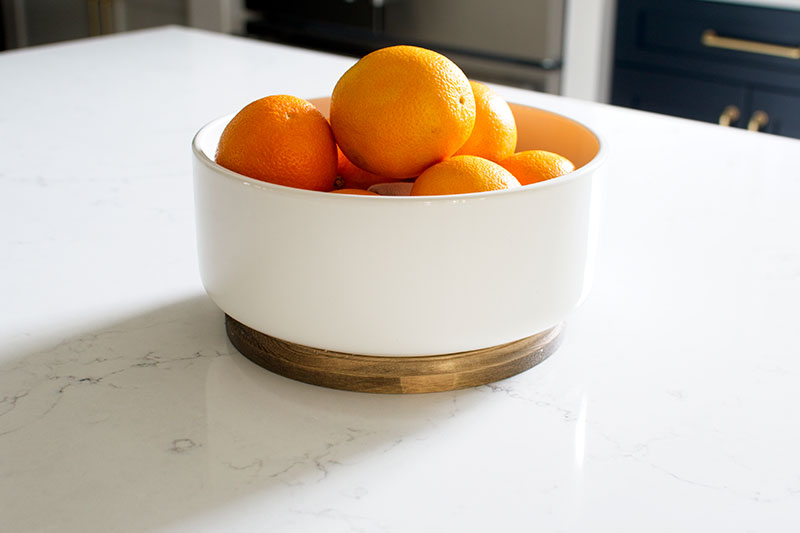
“AFTER” – MODERN & STYLISH FRUIT BOWL!

I found the white ceramic bowl at Homegoods last year for $7 and it holds quite a bit of fruit (a must in my book!). While it looks nice and the size of it is perfect for the island, it’s definitely not winning any awards for being super stylish.
I also don’t like a “cold” surface touching another “cold” surface (I’m really weird about this) and I figured I’d like the bowl better if there was a buffer between the ceramic bowl and the quartz countertop.
So whenever I can’t find exactly what I’m looking for, I go the semi-DIY route. And I’m super happy with how it turned out – I think my search might finally be over. Hallelujah!
THE SUPPLIES YOU’LL NEED FOR YOUR PROJECT
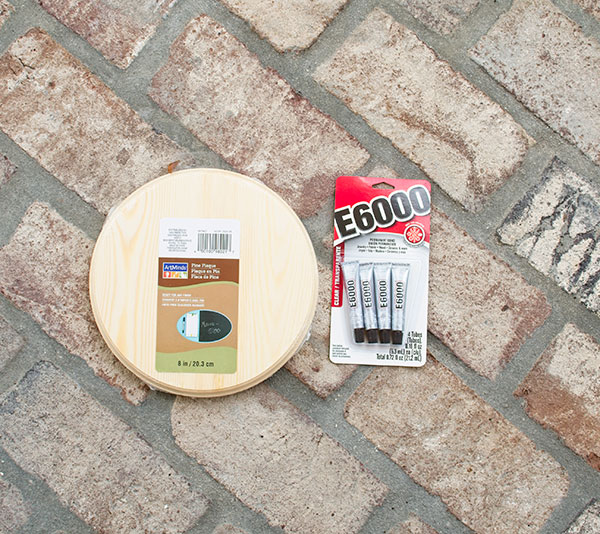
• Ceramic bowl in whatever size/shape you desire
• Round pine circle plaque (this is the one I used) that will fit the base of the bowl
• Paint or stain of your choice (I used this stain color and this color)
• Finishing wax or polyurethane, if desired (this is the wax I use for my projects)
• Craft glue (this is my favorite)
• Gloves to protect your hands from the paint or stain
• Paper towels
LET’S GET STARTED!
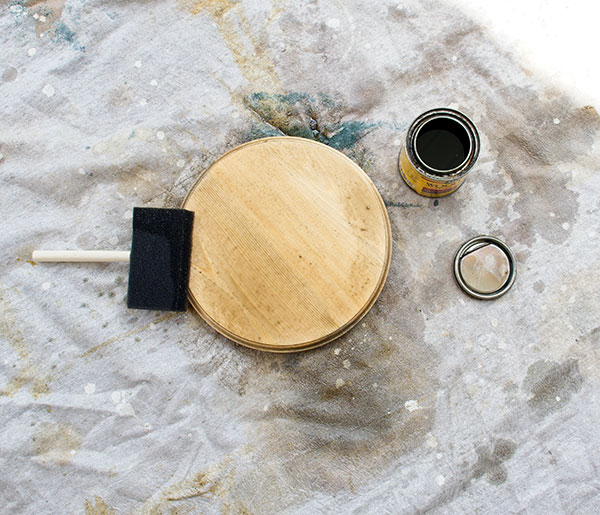
STEP 1: If you are using stain, apply a coat of stain to the top and sides of the wood circle.
Allow it to sit for about 30 seconds.
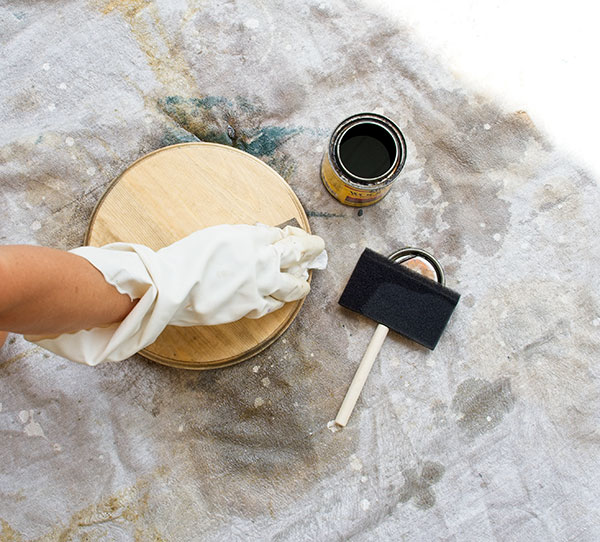
STEP 2: Wipe the excess stain off with a dry paper towel.
If you want the stain to look darker, apply another layer, let it sit a little longer, and wipe off with a clean paper towel.
NOTE: If you’re painting the wood instead, I suggest painting at least 2 coats so the wood grain doesn’t show through (unless that’s the look you’re going for, of course.)
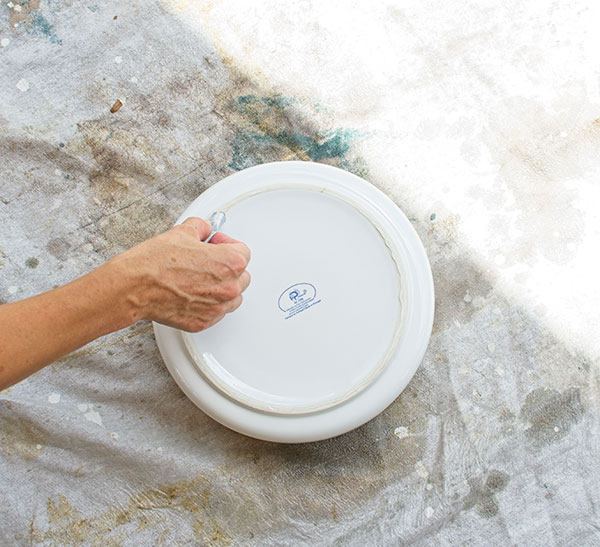
STEP 3: Take the craft glue and run a bead all around the rim of the bowl’s base.
Then take the wood circle and lay it gently onto the bead of glue (make sure the pretty top side of the wood is the one getting affixed to the bowl!).
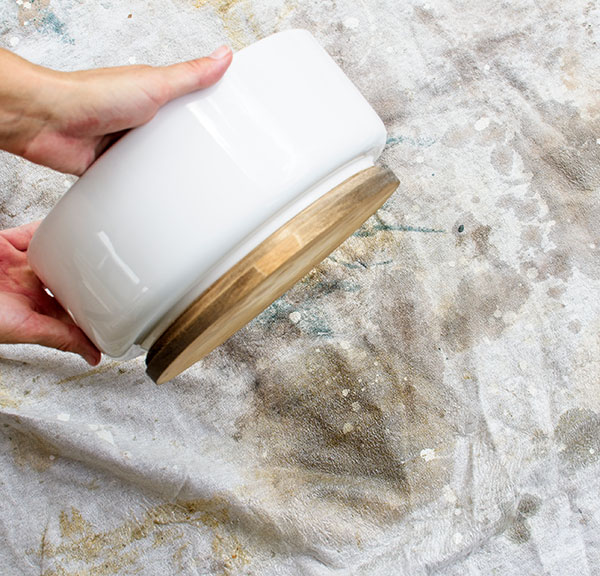
STEP 4: Press the wood firmly against the bowl while making sure it’s aligned exactly how you want it. This glue adheres quickly so work fast!
Quickly wipe off any excess glue with a damp paper towel.
And if you want, apply a coat of finishing wax or polyurethane to the sides of the wood circle.
STEP 5: Display your zhooshed-up bowl proudly in your kitchen and enjoy what you just made!
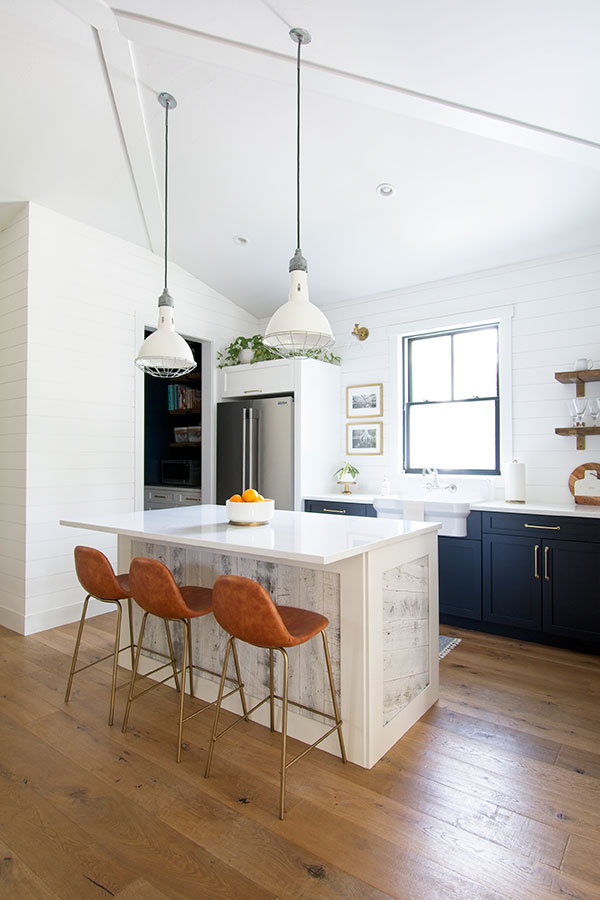
HOW IT LOOKS IN OUR KITCHEN
![]()
I hope you enjoyed this quick & easy DIY project as much as I did! If you’re looking to tackle more DIY projects, make sure to check out these other DIY posts.
Thank you so much for following my blog and for letting me help you create your own lived-in, loved-in spaces!