

After our beloved dog, Faith, died from cancer in early May (you can read all about it here and here), I’ve been keeping my mind and soul busy by checking a few DIY projects off my gargantuan Wish List. (If only my bank account could grow as quickly as my project list …).
For me, doing something creative is incredibly healing and this super quick and easy project was the perfect outlet for my grief. And I absolutely loooove the way they turned out!
I think once you “age” your first terracotta pot, you’re going to become addicted to how crazy simple it is to do and how budget-friendly it is as well!
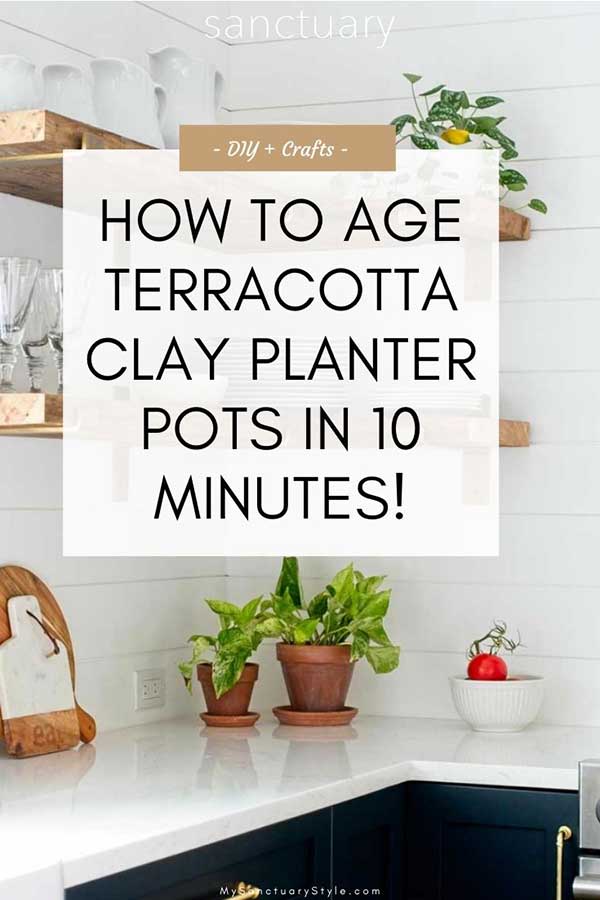
THE “BEFORE” SITUATION – PRETTY BUT “MEH”

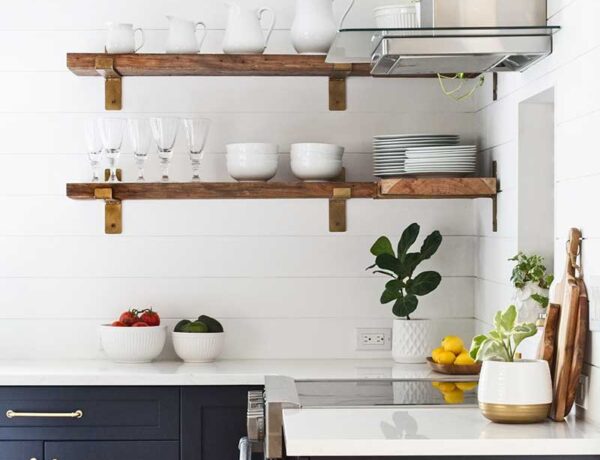
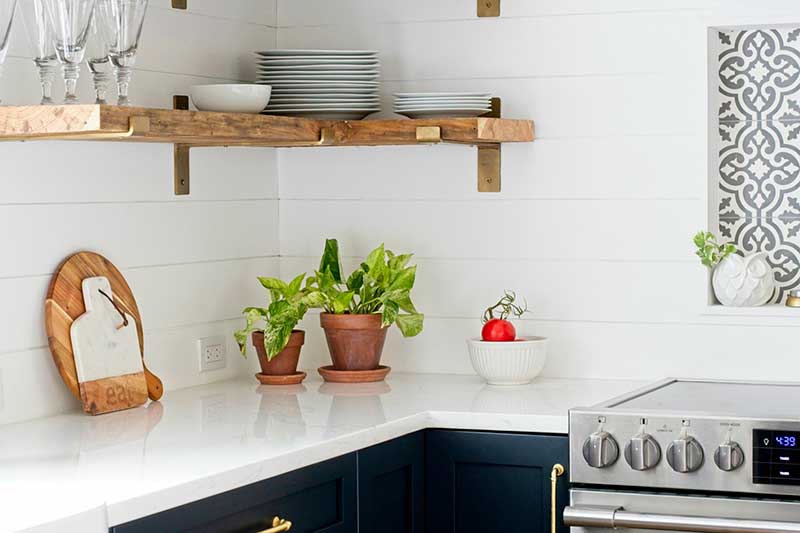
I love all the rooms in our farmhouse but I gotta say, I think the kitchen is my fave.
It’s small but DANG! it’s a workhorse because I planned out exactly how every little inch was going to be used. We don’t have any upper cabinets yet we don’t lack any storage space whatsoever, and it makes the room feel much larger than it is.
Anyway, there’s this little corner nook under the open shelving that’s been begging for something cute to take up residence there. I wasn’t quite sure what it needed so I bought a pretty white glazed clay pot, stuck a pothos plant in it, and called it a day.
I liked the zhooshed-up nook well enough but it just felt so dang “cold” with all the white on white on white on white …
I realized that the corner lacked warmth and contrast so I got busy looking for inspiration, which I ultimately found in a book I bought well over a year ago but never read. Ha!
THE INSPIRATION – JOANNA GAINES’ “HOMEBODY” BOOK
 Page 122 in Joanna Gaine’s “Homebody” book
I gotta confess something … I bought this book on November 24, 2018 (the receipt is still in it) but I only got around to reading it two months ago! I guess I can thank the pandemic lockdown for forcing me to slow my roll and actually sit down and enjoy reading a book or two again.
I was so inspired by this book! Not only as an interior stylist but as a photographer as well. The photos in this book are simply stunning – each one is a beautiful work of art that should be framed and proudly displayed on a wall somewhere. No joke.
I noticed a recurring item – aged terracotta pots – in the majority of the spaces she decorated and loved how they added just the right amount of warmth to an area. I had an AHA! moment and knew THAT’S exactly what the kitchen nook needed.
Clay pots that already look aged can be a bit pricey so I decided to go the DIY route!
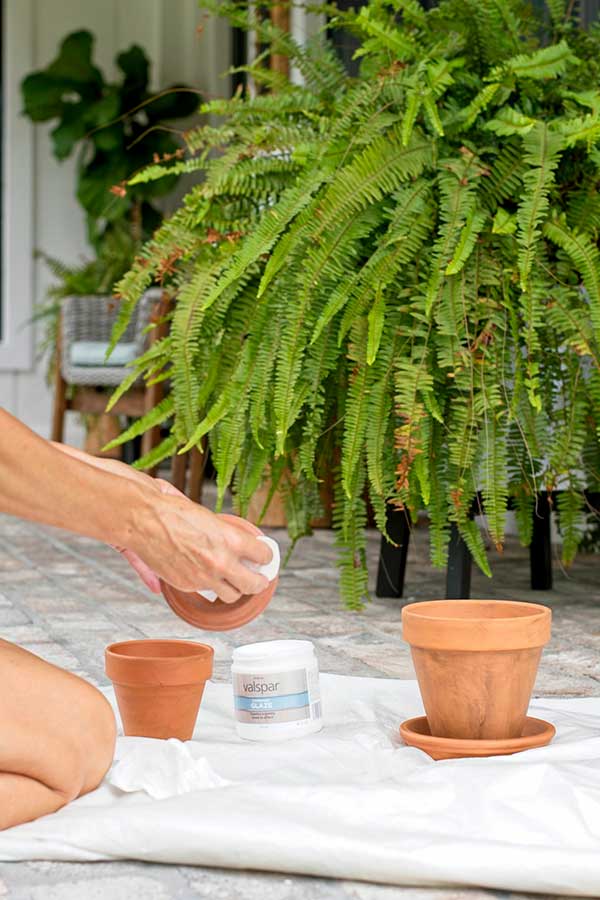
THE SUPPLIES YOU’LL NEED FOR YOUR DIY PROJECT
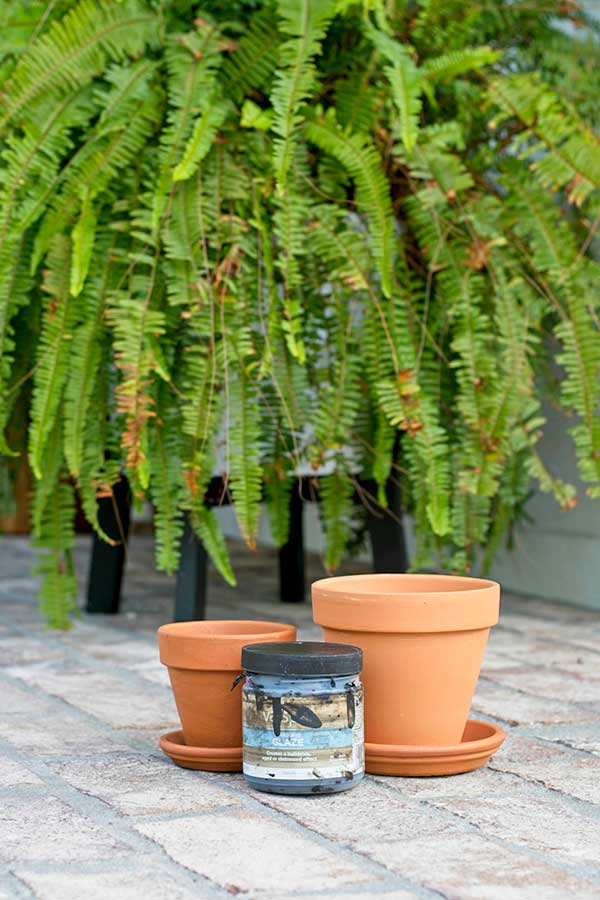
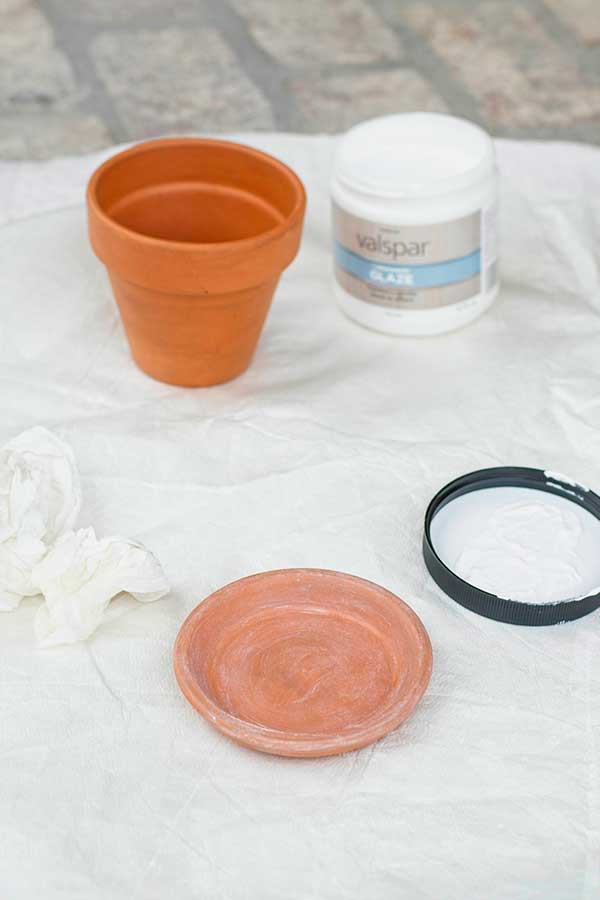
• Terracotta pots and saucers – I used this size and this size for my project.
• Valspar Antiquing Glaze – I’ve had it for 2 years now and I use it on EVERYTHING – it’s pure magic!
• Valspar Limewash Glaze – this is the first time I used it and I’m hooked!
• Damp paper towels
• Dry paper towels
A little side note: Use whatever size pots you want for this project – you don’t need to use the sizes I used.
START WITH THE ANTIQUING GLAZE
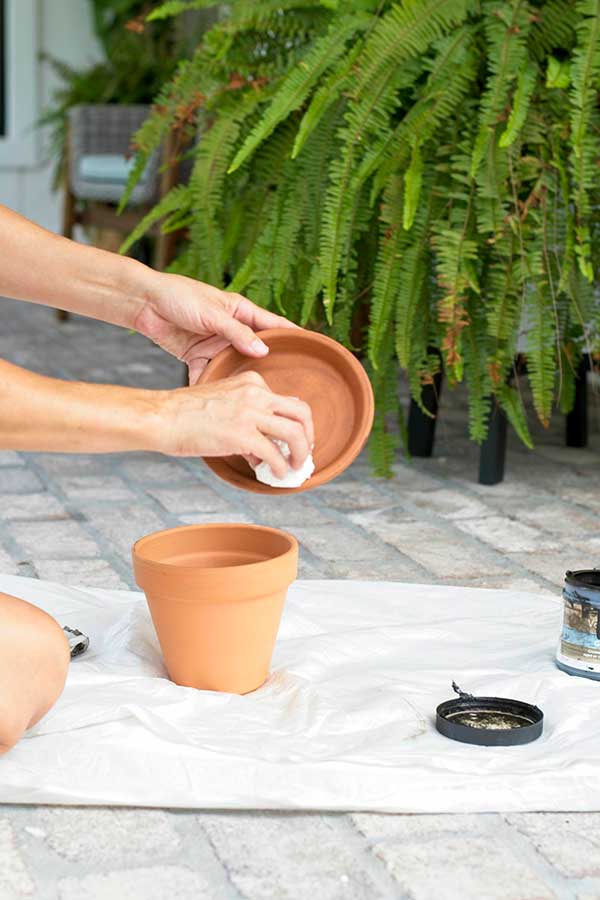
STEP 1: Take a damp paper towel and dip a corner of it into the lid of the antiquing glaze (a little goes a long way) and rub onto small sections at a time.
IMPORTANT!: Quickly go right to Step 2 after rubbing each section with glaze. You don’t want the glaze to set.
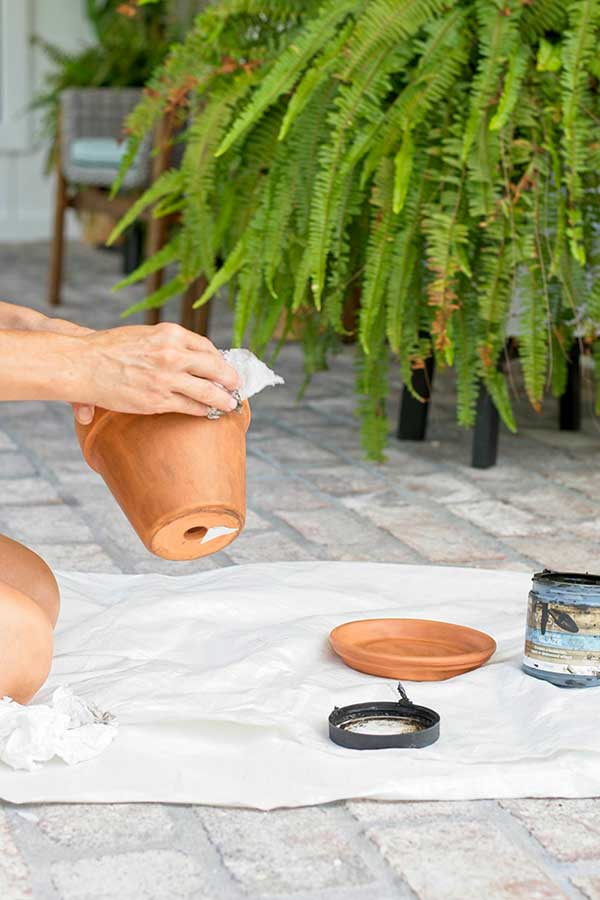
STEP 2: Immediately take a dry paper towel and wipe off the glaze.
If you want the glaze to look darker, then build it up with thin layers instead.
 Left is glazed, right is unglazed. Already looks pretty dang good!
HOT TIP: Make sure to glaze the top 1/3 of the inside of the pot too because that part typically peeks out over the dirt.
FINISH IT OFF WITH THE LIMEWASH GLAZE
Step 1: Take a fresh damp paper towel, dip it onto the lid and rub the glaze over the whole pot and saucer.
This glaze doesn’t take quite as fast to set as the antiquing glaze so it’s ok to let it sit for a few seconds.
Step 2: Take a fresh dry paper towel and wipe off the limewash glaze.
 How cute are these little buggers?
Step 3: Do a little happy dance because YOU’RE ALL DONE! Wasn’t that super quick, easy, and fun?
Feel free to go back and touch up any spots with either glaze to make the pot exactly to your liking.
THE “AFTER” – INSTANT WARMTH & CONTRAST
I hope you enjoyed “aging” your terracotta clay pot planters as much as I did! If you’re looking to tackle more DIY projects, make sure to check out these other DIY posts.
Thank you so much for following my blog and for letting me help you create your own lived-in, loved-in spaces!