I can’t believe we’re halfway through February already. Good lawd, how did that happen??!! Anyway, it sure feels good to finally get this post up on the blog and out of my little head.
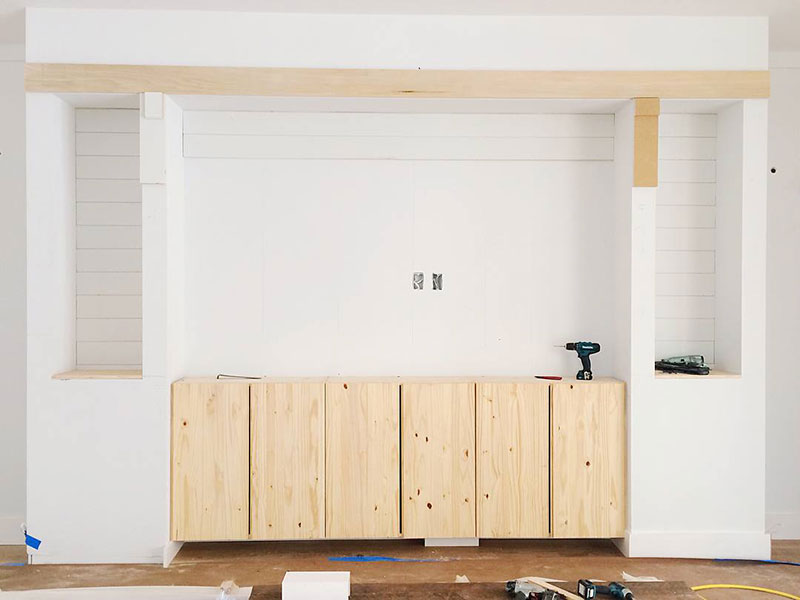
Let me preface this post by saying all the photos were taken with my crappy iPhone I had at the time. They were taken on the construction site in 2017 (before I started this blog) and I didn’t want to lug my expensive camera with me because I’m a HUGE klutz and knew the likelihood of me damaging my camera was very high.
Ok, now that I got that disclaimer out of the way, let’s move on to the good stuff!
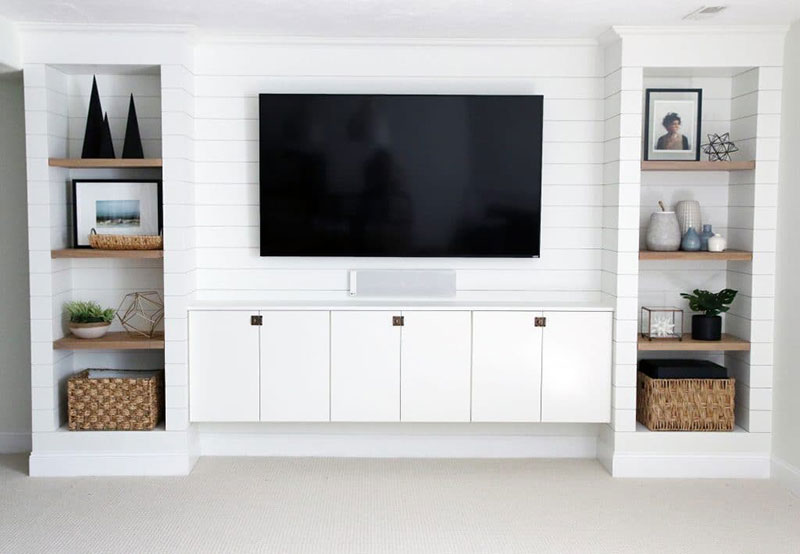
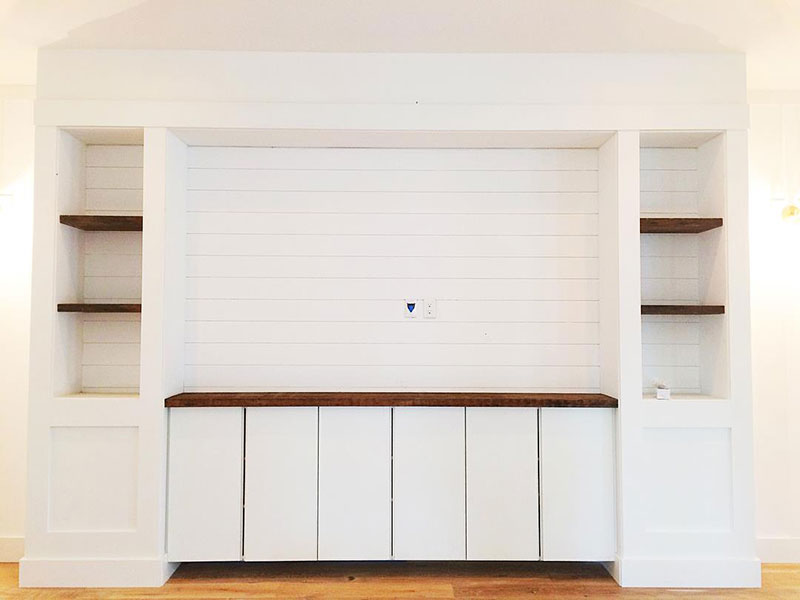
When we were planning out our farmhouse build back in 2016, we knew we really wanted a built-in media center since we’d never had one before. We always used some kind of media console cabinet but really wanted a built-in this time.
However, we knew that a custom built-in would come with a hefty price tag (about $20K) and we didn’t have the budget for custom cabinetry other than for our kitchen. So I had to get crafty and dove right into the online rabbit hole searching for DIY inspiration and came across this one that Chris Loves Julia did in a former home of theirs:
They were looking to add a built-in media center in their basement and their inspiration was this beautiful shiplapped built-in entertainment center designed by Studio McGee:
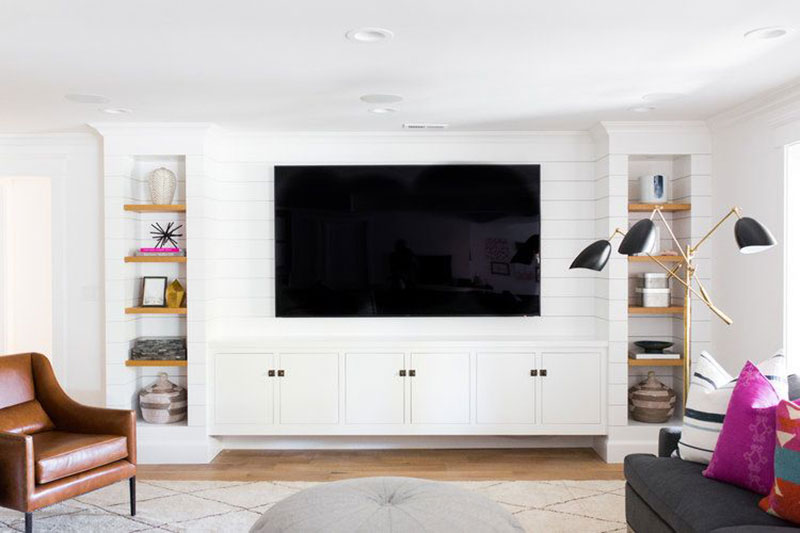
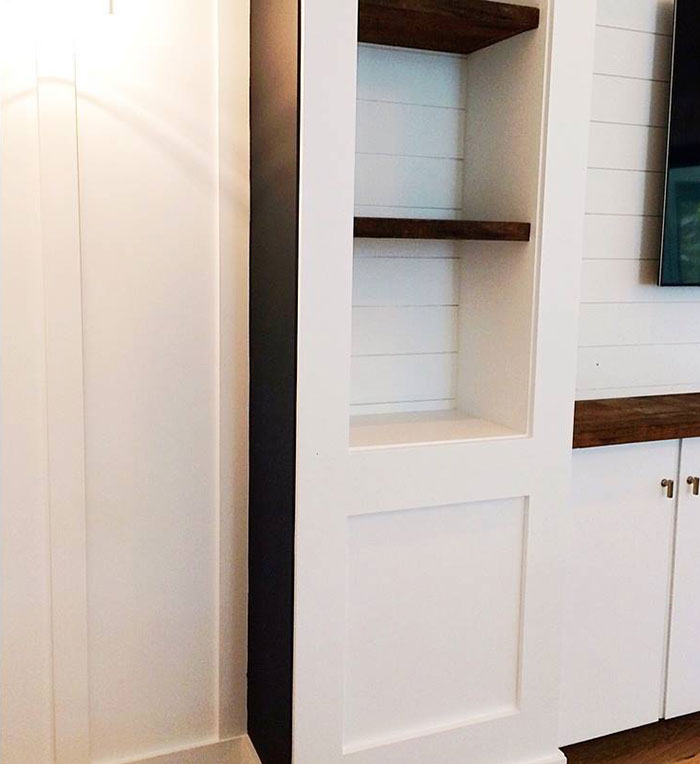
I loved the overall clean look with both of these but I didn’t want that many open shelves. I find the closer they are to the floor, the more dust and pet fur they seem to attract. I also wanted to use taller IKEA cabinets (these Ivar cabinets) than the ones Chris and Julia used to build their media center.
So I quickly sketched something up in Photoshop and sent that to our builder along with some inspo pics:
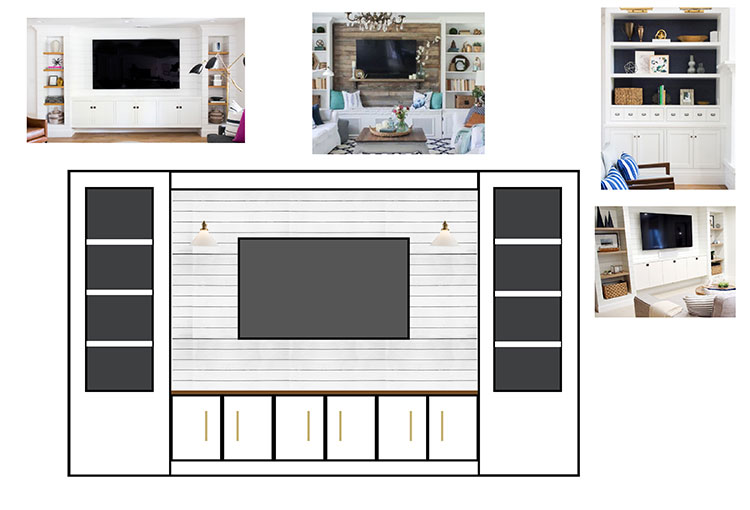
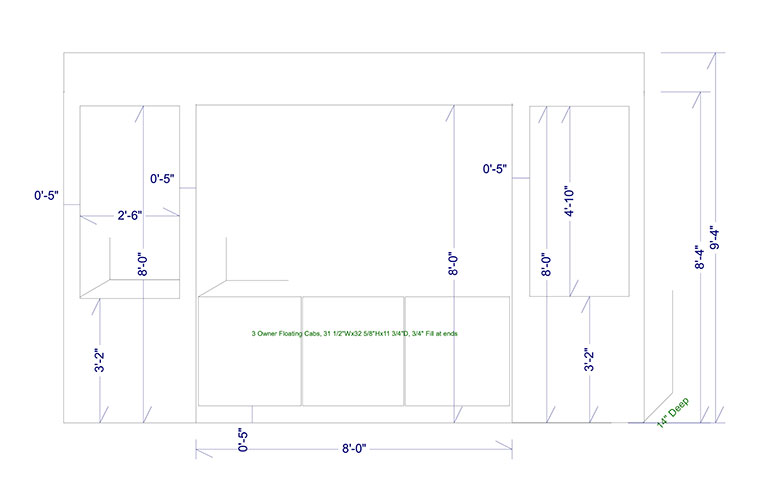
Our builder said they had never done anything like this before but was super excited to give it a go and sent his rough sketch to me (below).
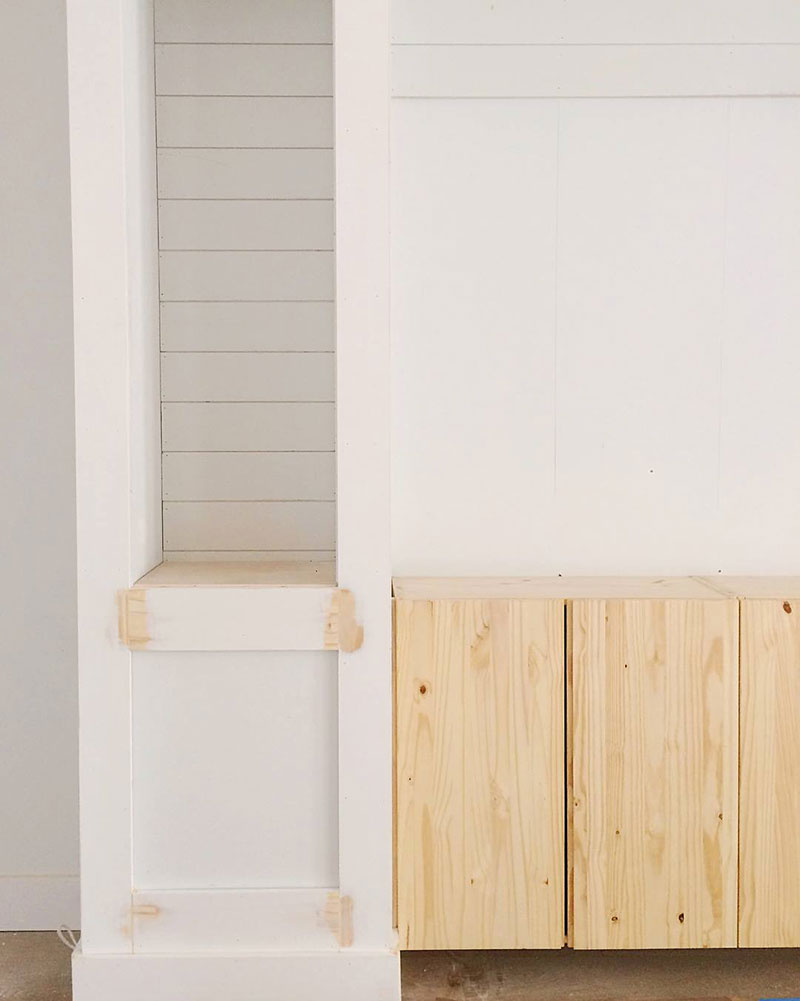
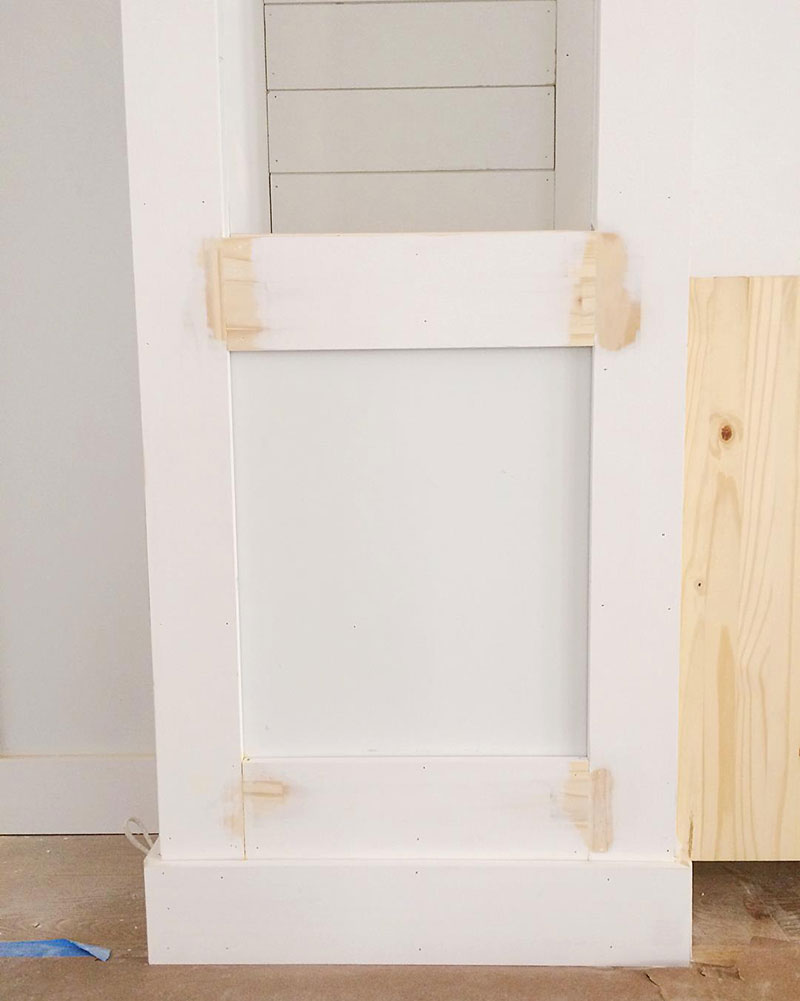
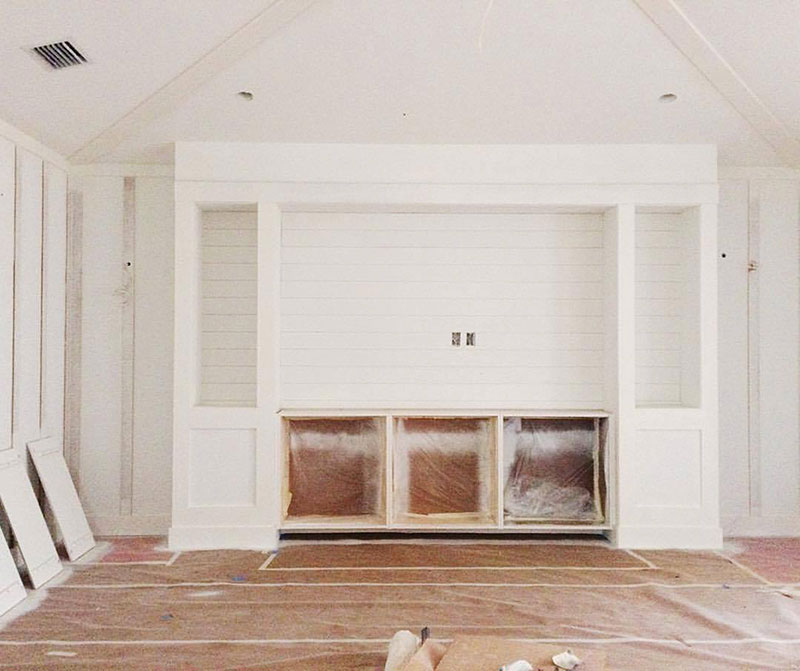
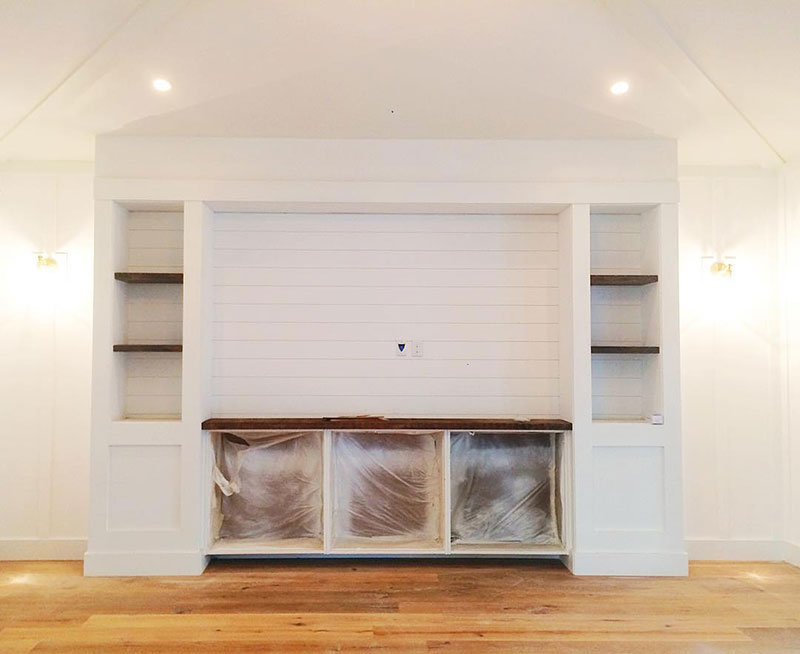
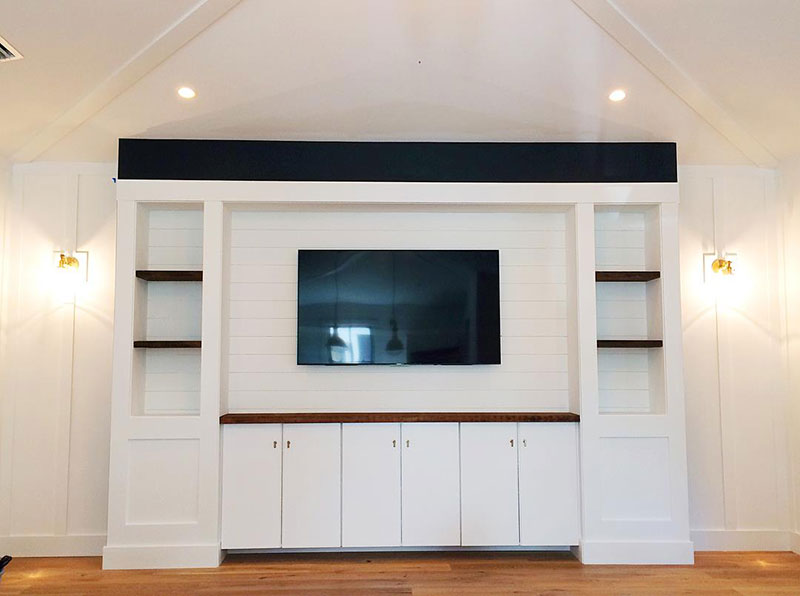
This was a great starting point and we knew there would be tweaks once the carpenters started building it on-site. I also moved the lighting to flank the sides of the media unit instead of being inside the media unit.
It was constructed with three IKEA cabinets, reclaimed wood, shiplap, metal frame studs, drywall, and wood trim and came in around $4,000-ish. Most of the cost was for labor so if you plan on building one yourself, you’ll save a ton of money!
I bought the antique reclaimed heart pine boards from a local salvage business in Fort Myers. After the unit was painted with Benjamin Moore Chantilly Lace, I added these satin brass cabinet knobs (about $6 each at the time) from Emtek to finish it off.
Then once we moved in and lived with it for a while, I decided to paint the header and the sides the same color as our kitchen cabinets (Sherwin Williams Inkwell) since the kitchen and family room are connected.
We love how it turned out and love all the extra storage we gained by using the tall IKEA Ivar cabinets. We keep board games, cocktails and glasses, and family photos in the cabinets.
So if you’re wanting a custom built-in cabinet but don’t have the budget for one, something like this might work out perfectly for you!


If you enjoyed reading this article, make sure to sign up for the weekly newsletter below so you never miss a post.
Thank you so much for following my blog and allowing me to inspire you to create your own lived-in, loved-in spaces!