I’ve been wanting to write this DIY post for a while now and I’m so excited to finally share it with you!
I posted this project on my personal Fuzzybutt Farm Instagram feed years ago and I STILL get lots of DMs asking where I bought our kitchen’s shelf brackets.
So I thought I’d go ahead and post the tutorial here so you can Pin it to your little heart’s delight. I’m a giver like that, what can I say.
I’M ADDICTED TO OPEN SHELVING
AND I DON’T CARE WHO KNOWS IT
When I was designing our new farmhouse’s kitchen back in 2016, I knew I didn’t want upper cabinets. When we renovated our previous home (the sweetest little vintage beach cottage) from top to bottom, I didn’t put uppers in that kitchen either and I freaking LOVED it. It was that house that started my deep love affair with open kitchen shelving.
At the time we remodeled that kitchen (2012), open shelving wasn’t really as much of a “thing” as it is now. When friends were asking me what my plans for the kitchen design were and I’d tell them we were going to use reclaimed wood shelves instead of upper cabinets, they’d stare at me like I had two heads or something. They thought it was THE weirdest thing ever and I could tell they weren’t feelin’ it.
Fast forward to five seasons of “Fixer Upper” having aired on HGTV, and now everyone is suddenly into the open shelving concept and it’s not so “weird” anymore. Go figure.
I know for a fact I’ll never want upper cabinets in any future kitchen we might have – I don’t miss them one bit. I feel like upper cabinets make a kitchen feel small, cramped and dark (since they tend to block any nearby window light), and they just look so bulky and heavy.
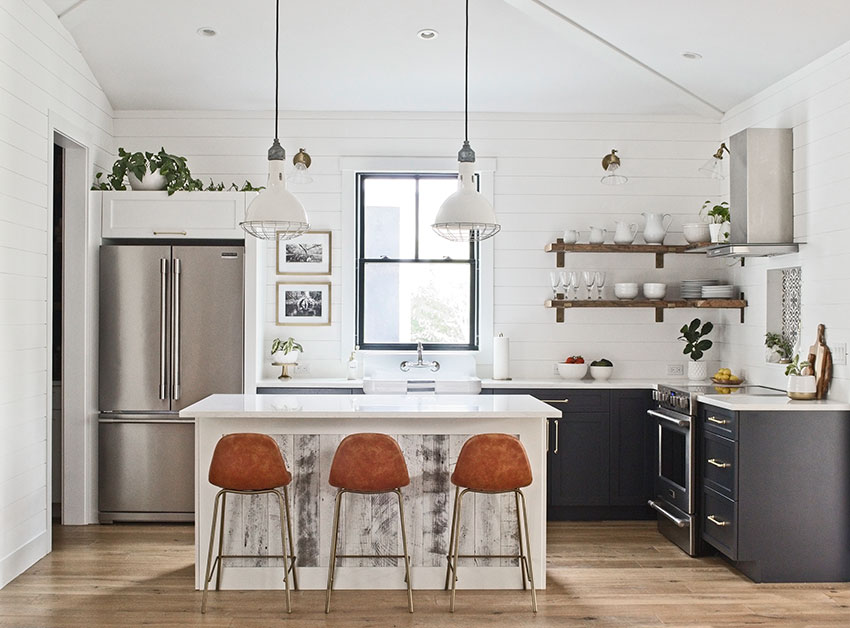
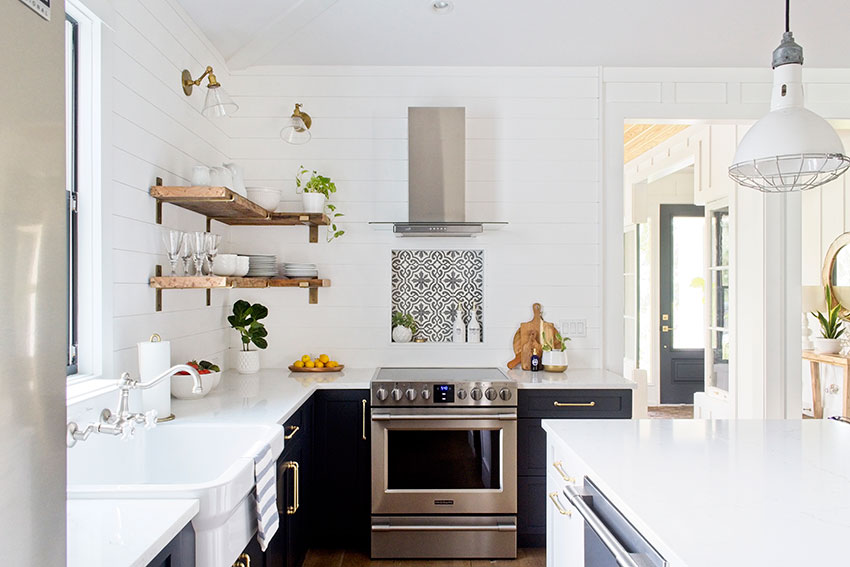
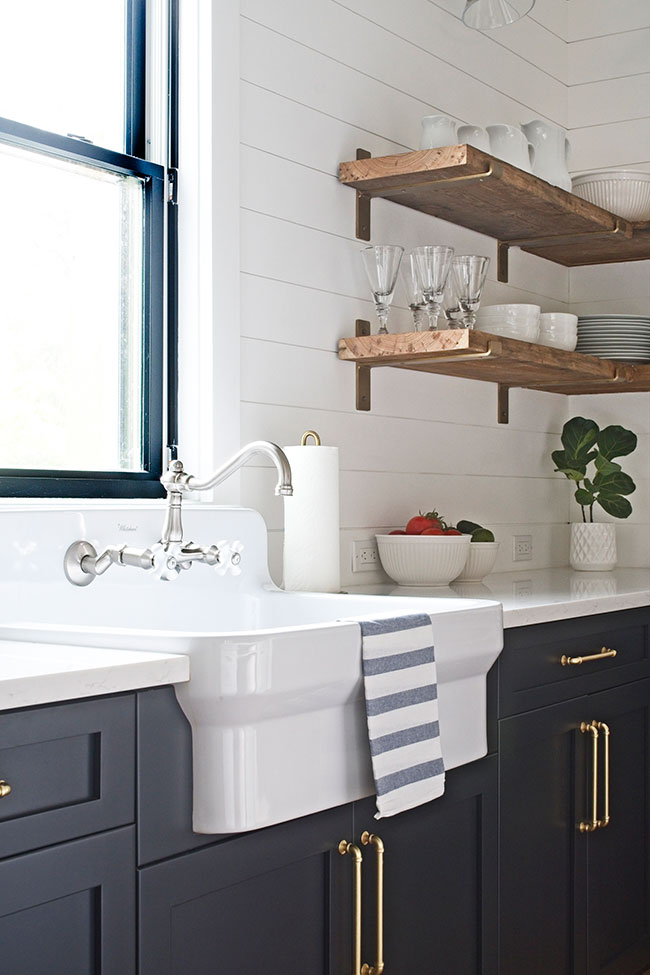
I LOVE the open and airy feeling our kitchen has with our antique heart pine shelves and I adore seeing our cute white dinnerware and drinking glasses on display every day instead of being hidden away behind a cabinet door.
People ask if we have problems keeping dust at bay, and we really haven’t had any issues since we use the dinnerware and glasses all the time. The items on the top shelf can get dusty but it’s not that big of a deal – nothing a quick swipe of the vacuum can’t fix.
In a past house of ours, I had pretty glasses stored in kitchen cabinets that had glass fronts and I was cleaning dust out of those cabinets and glasses ALL THE TIME. So having a door didn’t keep that dust away.
One added bonus about using open shelving is we were able to save a LOT of money by not using upper cabinets in our kitchen build and remodel projects. That allowed us to reallocate those funds toward other items instead.
Another bonus about not having upper cabinets is that it forces me to not accumulate crap in our kitchen that we never ever use. It has compelled me to rethink just how much stuff do we actually need in our kitchen? In reality – not that much, actually.
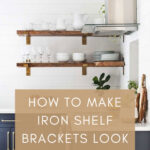
SUPER EASY AGED BRASS
SHELF BRACKET DIY PROJECT

For our farmhouse kitchen, I wanted brackets that were different than the ones I used in our vintage beach cottage. Those were black iron and while pretty, they ended up taking center stage instead of the gorgeous antique heart pine shelving and that wasn’t my intent.
So this time around, I wanted the brackets to “be there but not be there” if that makes sense. I also wanted something that exuded warmth so I knew they needed to be brass. And I didn’t want brackets that looked big and bulky – they needed to have a small footprint.
I started scouring the Internet for satin brass heavy-duty shelf brackets (which was slim pickens in 2016 before satin brass became the new “it” thing), and anything I found was ridiculously expensive around $100 per bracket. PER BRACKET! I needed 14 brackets (we have open shelving in our butler’s pantry as well) so I wasn’t about to spend $1,400 on brackets alone. Hard pass.
So what’s a girl to do in this situation? Well, go the semi-DIY route, of course!
 Image Source: Camilla Banks Interior Design
After spending hours upon hours of looking for inspiration, I came across this photo of a charming English kitchen and I knew these were the brackets I wanted, except that our brackets would be brass.
I found an Etsy shop owner that I believe may have created these actual brackets because they look identical to the ones in this photo, and the shop owner also happened to live in the U.K. just like the interior designer.
Unfortunately, the Etsy shop owner didn’t ship to the U.S. so I wasn’t able to go that route. Boo. Back to the old drawing board …
Luckily, I’m pretty relentless when it comes down to hunting for interior design elements and I love rising up to the challenge. A rush comes over me whenever I find an elusive piece I’ve been searching for – it’s quite addictive, really.
I happened to find another Etsy shop owner (update: their shop has since closed ?) that makes iron brackets that look pretty similar to my inspiration brackets, but the part that attaches to the wall was a bit too tall for my liking. So I reached out to the shop owner and asked if he could make brackets to my own specs and he said he could. Sweet!
I needed 8 heavy-duty (very important!) brackets that could hold shelves that were 12.75″ wide and 1.75″ thick, and I also needed 6 brackets that could hold shelves that were 10″ wide and 2″ thick. All in (shipping included), 14 brackets ended up only costing $300!
Now that my search was over and the brackets were on their way, I was ready to move on to the fun part: painting them to look like aged brass.
EVEN IF YOU SUCK AT DIY,
YOU CAN TOTALLY DO THIS PROJECT
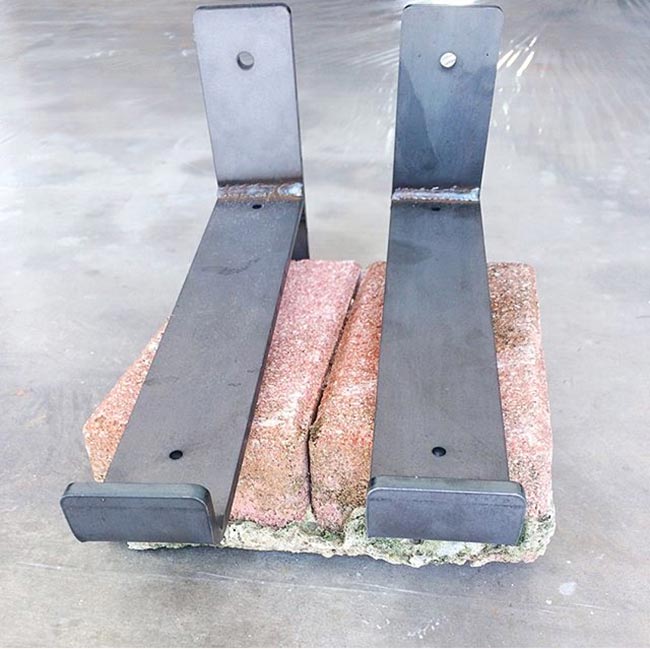
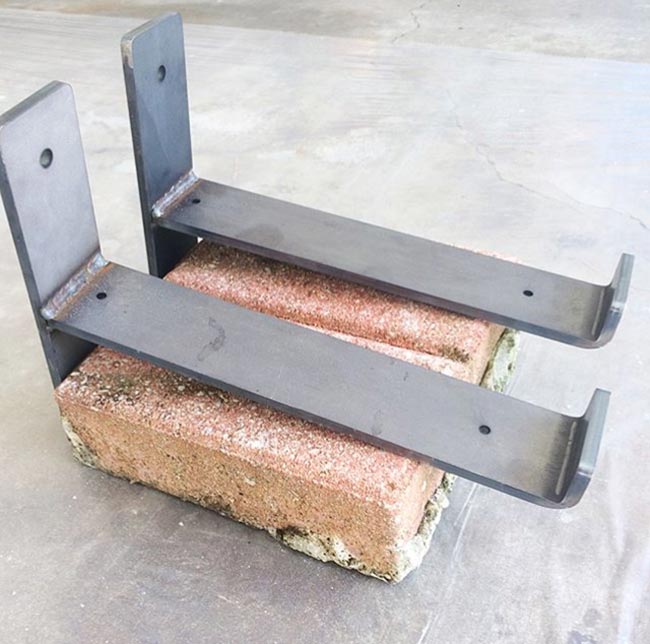
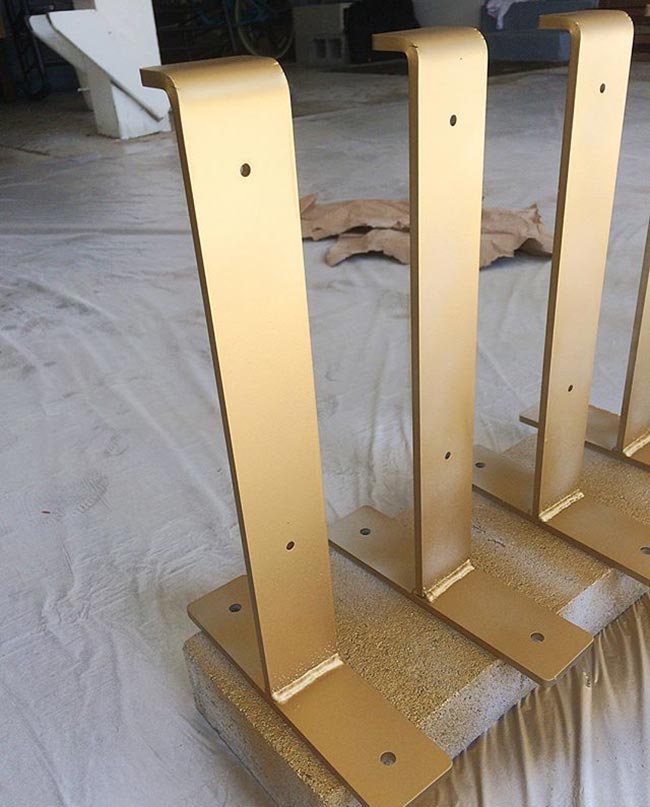
This is what the raw iron brackets looked like when they were delivered.
They looked cool, but nothing spectacular. With a few easy steps and some spray paint, that was about to change.
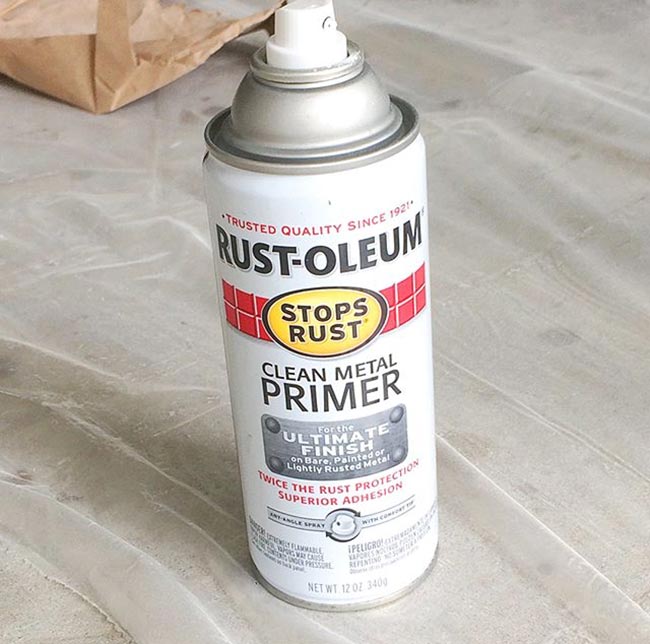
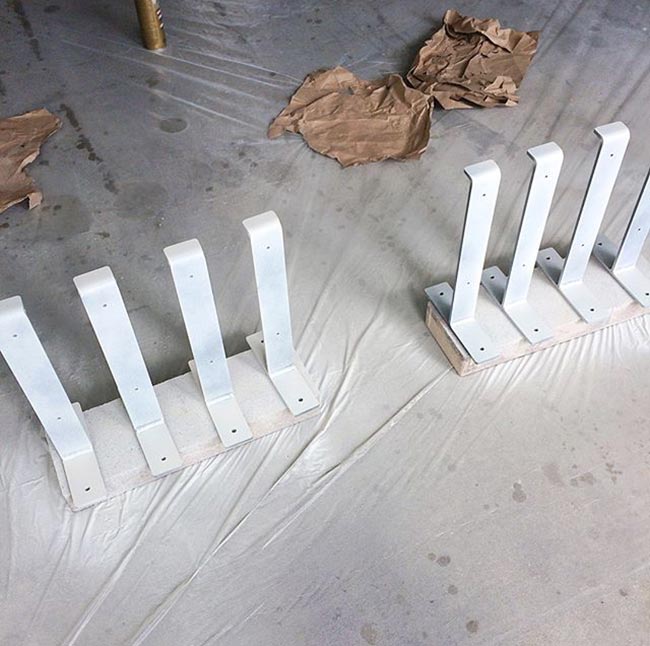
STEP 1: Spray every side of each bracket with a couple of thin coats of metal primer paint and allow to dry and cure overnight.
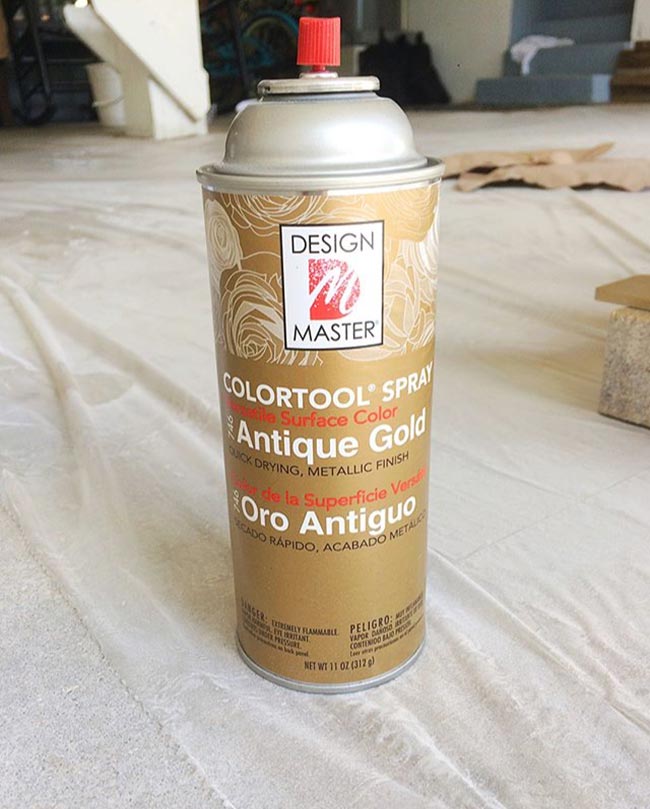
STEP 2: Spray every side of each bracket with gold spray paint and allow to dry and cure overnight.
After trying quite a few gold spray paints on other projects, this is my all-time fave. It looks the closest to satin brass and has a beautiful finish.
I bought mine at Michael’s so I could use my 40% off coupons. This spray paint runs $8 per can so that coupon comes in pretty handy when you need a few cans!
 \
\
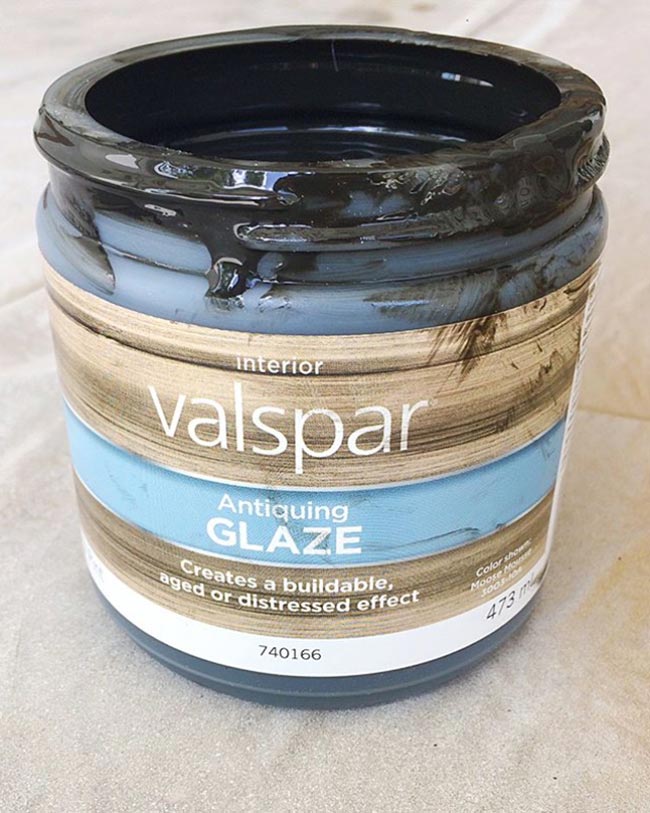
STEP 3: With a clean cloth (staining cloths work really well for this part), wipe some antiquing glaze (you don’t need to use a lot) on every side of each bracket. With a clean cloth, immediately wipe off any excess. You don’t want it to look all blotchy.
This glaze will help take down the brightness and the color uniformity of the gold spray paint and will help make it look like brass that has aged over time. I LOVE this glaze – I have used it for numerous projects and it never lets me down.
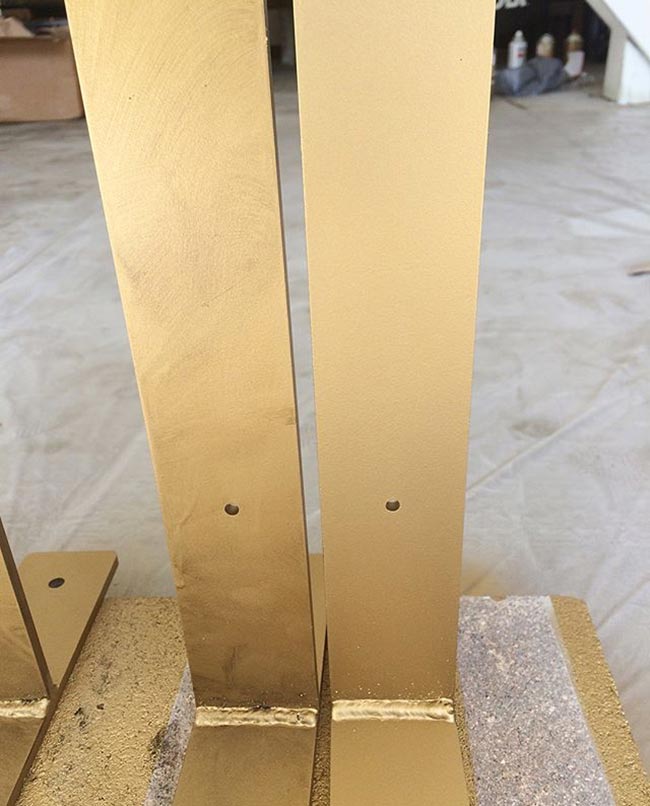
In the photo below, you can see the glazed bracket on the left and the unglazed bracket on the right to see what a difference the glaze makes.
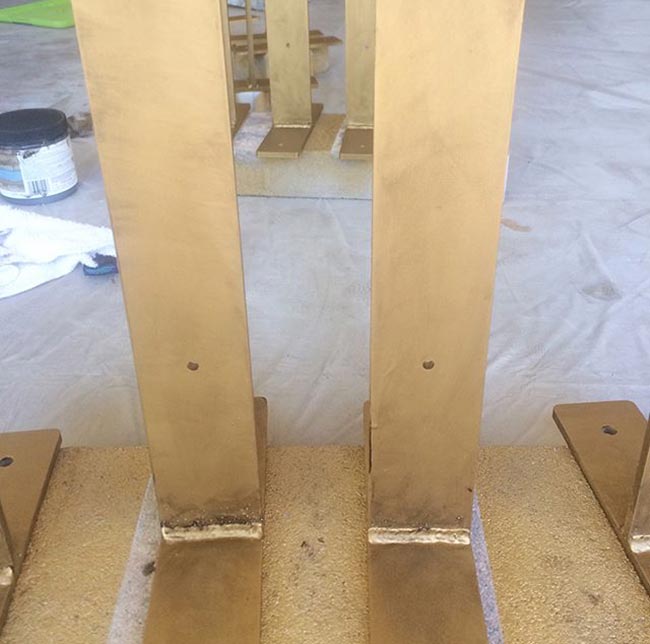
Below are two of the finished brackets. You can see how the glaze helped tone down the bright gold color while also adding some much-needed dimension to the flatness of the spray paint’s finish.
STEP 4: Spray a couple of coats of clear coat spray paint on all sides of each bracket and let them dry and cure for a few days before installing the brackets. This is the clear coat spray paint I used.
STEP 5: Sit back and enjoy the fruits of your DIY labor!
I can’t even begin to tell you how amazing these brackets look in person – the camera can’t seem to capture just how beautiful they really are.
They look like they cost MUCH more than $20 each, and the warm tone of the gold paint pairs perfectly with the antique heart pine wood.
If you’ve been wanting to do something a little different with shelf brackets, whether it be for your kitchen, home office, laundry room, bedroom, etc., I think this DIY project is right up your alley! And if you do happen to tackle this project, PLEASE PLEASE PLEASE send me some pics. I’d LOVE to see how your project turns out!
If you have any questions about design sources in these kitchen photos, just click here to get all the details for any room in my farmhouse.
Thank you so much for following my blog and for letting me help you create your own lived-in, loved-in spaces!