
I’ve never been a person that enjoys sitting down for too long – I get bored incredibly fast.
Instead, I try to eek out every minute of every day and you’ll usually find me puttering around the house working on projects, playing my guitar or beating the hell outta my drums until it’s time to go to bed.
One of the things I really love doing while puttering around is taking care of my 50 or so houseplants. I find it incredibly relaxing and rewarding, especially when making little green plant babies!
MAKIN’ GREEN BABIES ALL DAY
LONG UP IN HEEEERE…
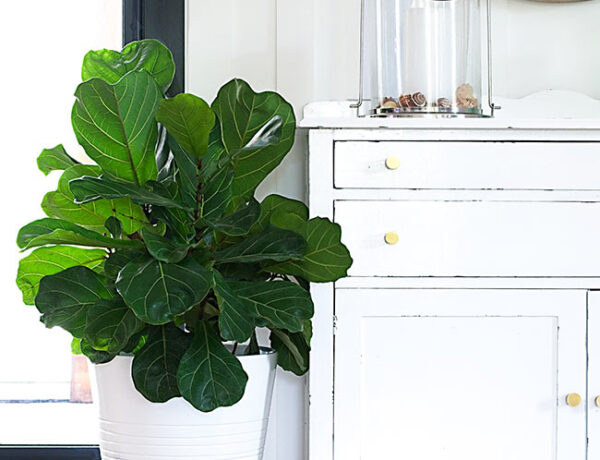
If you’re new here, you should check out my “Going Green: How to Take Care of Your Fiddle Leaf Fig“ blog post. It’s one of my most popular posts on both my blog AND my Pinterest proving that there’s SO much love out there when it comes to the insanely gorgeous Fiddle Leaf Fig tree.
In that blog post, I showed how to make a Fiddle Leaf Fig baby through propagation (a fancy term for making plant babies from cuttings of plants). It’s super cool to be able to buy one Fiddle Leaf Fig and then make all kinds of babies – for your own home or to give away as gifts – just from that one plant!
I once made a Fiddle baby to give to an interior decorating client of mine as a housewarming gift. It was THE cutest thing ever, just sitting there in its fancy little Robin’s Egg blue ceramic planter – I wanted one for myself! It’s an awesome feeling to be able to share my love of plants with others, especially when it brings them peace and joy.
Anyway … it’s been about a month since I took cuttings from 2 of my Fiddles and thought this would be a great time to give you guys an update on their progress. So let’s get started!
PATIENCE IS A VIRTUE …
AND A GIANT PAIN IN THE ARSE
The one piece of advice I’d like to give you when making Fiddle babies for the first time is, you MUST have patience because it can take a LONG. ASS. TIME for the new roots to sprout. You might think you’re doing something wrong because you’re not seeing anything coming from the end you cut, but you’re not. It just takes a LONG. ASS. TIME for anything to happen.
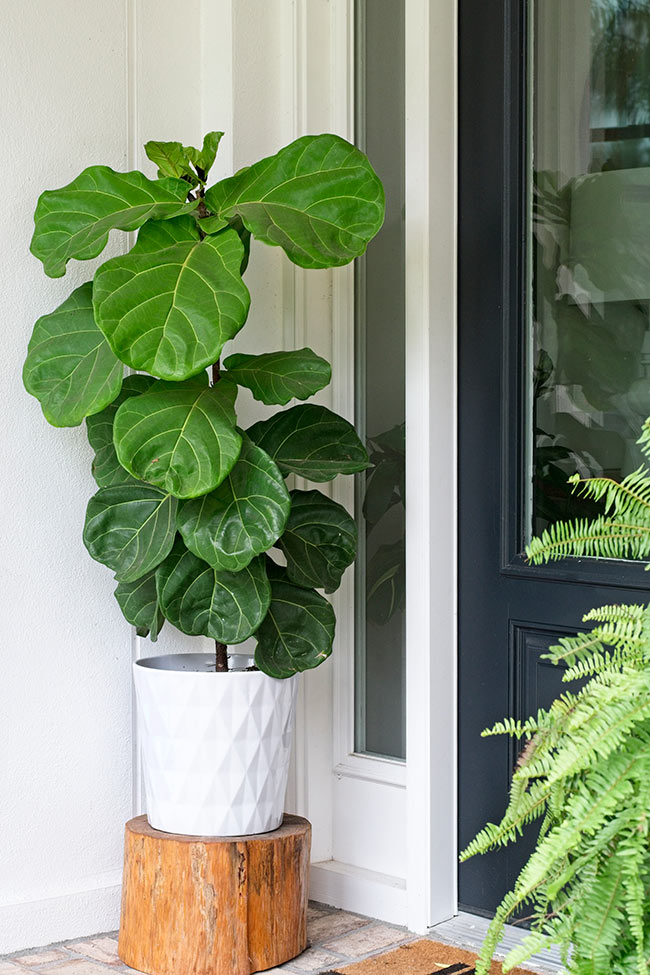
My last baby Fiddle took just over 30 days for the new roots to sprout and it’s been taking a bit longer for my current baby Fiddles’ roots to sprout. It may be because the last time, I placed the baby on our front porch where it received plenty of indirect light. Whereas this time, the babies are on our back porch which doesn’t get as much bright, indirect light. So I moved one of them to the front porch today to see if that makes any difference.
Here is a photo I took 20 days after I made the cutting and you can see the new roots are just starting to form on the little trunk.
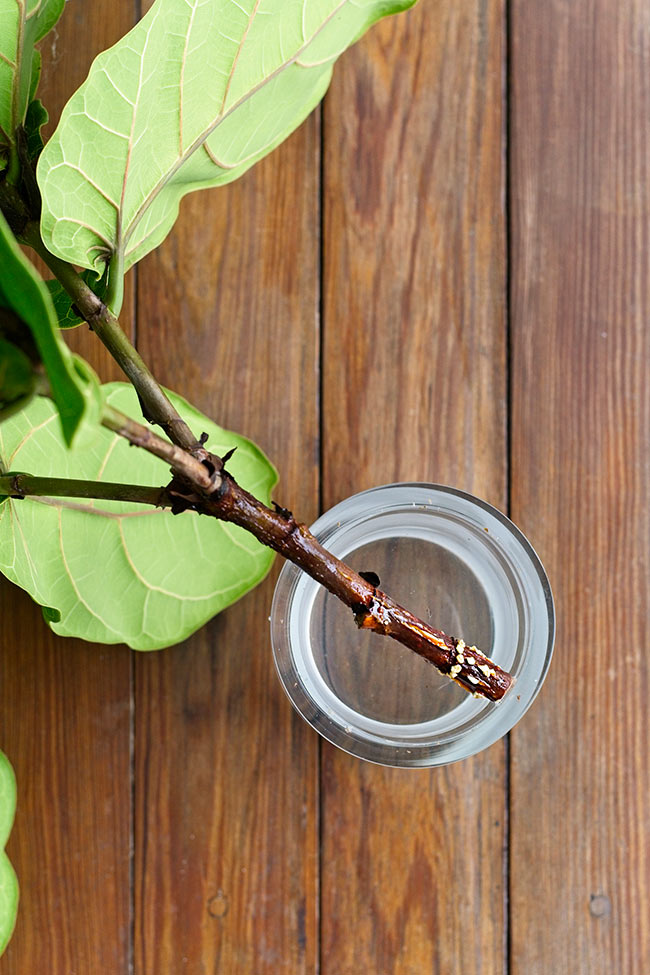
And I took the next photo 14 days later where you can see just a tiny bit more growth of the roots – it’s barely noticeable in these photos but there actually has been some progress.
I’m curious to see if moving this cutting to the front porch makes a difference in the rate of growth of the new roots.
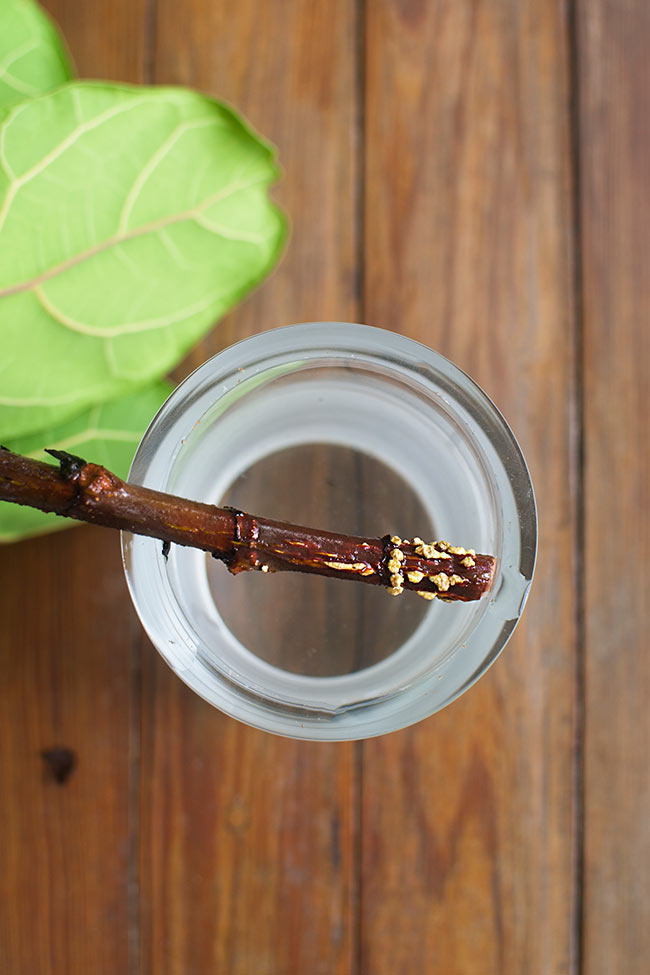
I highly recommend putting your cutting in a clear vase so you can easily monitor the progress of the roots. You can certainly put your cutting in a small pot of dirt, but you won’t be able to know exactly when the roots sprout unless you pull the cutting out of the pot.
Make sure to change the water in the vase at least once a week to keep your cutting happy in its temporary home. Nobody wants to sit in their own filthy bathtub for days at a time and that includes your precious little cutting.
A THREESOME
(OF THE PLANT KIND)

If you’re new to owning a Fiddle Leaf Fig and your Fiddle has a single trunk, you may be wondering how the hell you get your tree to look like all the glorious multi-branched Fiddles you see on Instagram and Pinterest.
Wanna know the secret sauce? Cuttings! If your tree is a few feet tall and the thought of cutting the top off makes your stomach turn in knots, don’t sweat it. Making a cutting is exactly what you need to do if you want your Fiddle to branch out and REALLY start showing off.
After making your cutting, your Fiddle will naturally split out into three more branches and then you can start shaping it to look like the gorgeous tree you always imagined it could be. And believe it or not, it doesn’t take that long at all for that magic to happen. Let me show you …
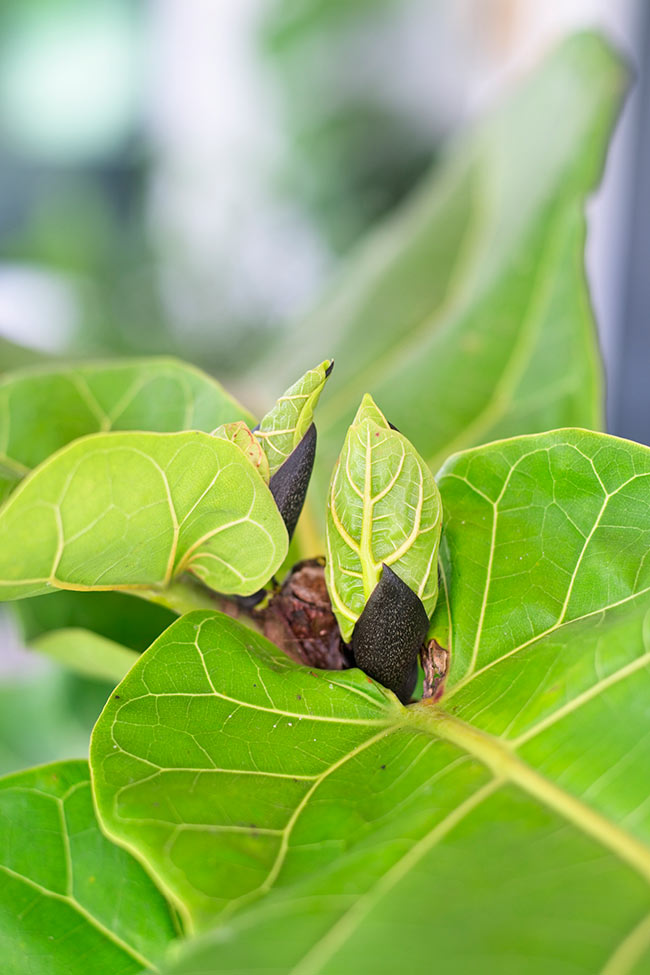
![]()
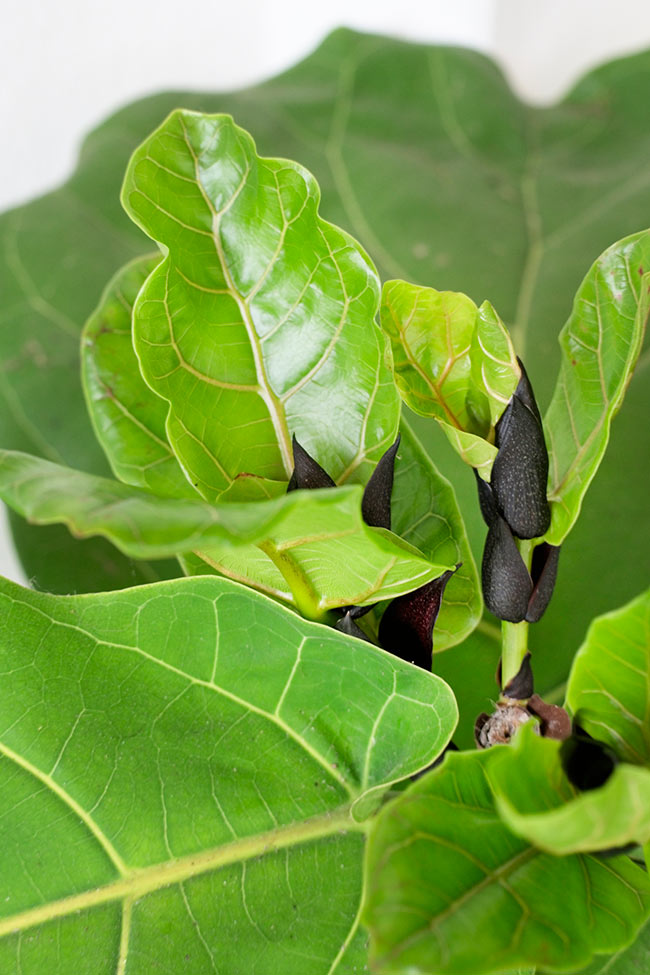
I took the two photos above 20 days after I made the cuttings. You can see 3 new branches have sprouted from where I made the cuts, and new leaves are starting to emerge from the little pods.
And here are the same Fiddles a mere 14 days later. You can really see the 3 new branches now and the leaves are HUGE already!
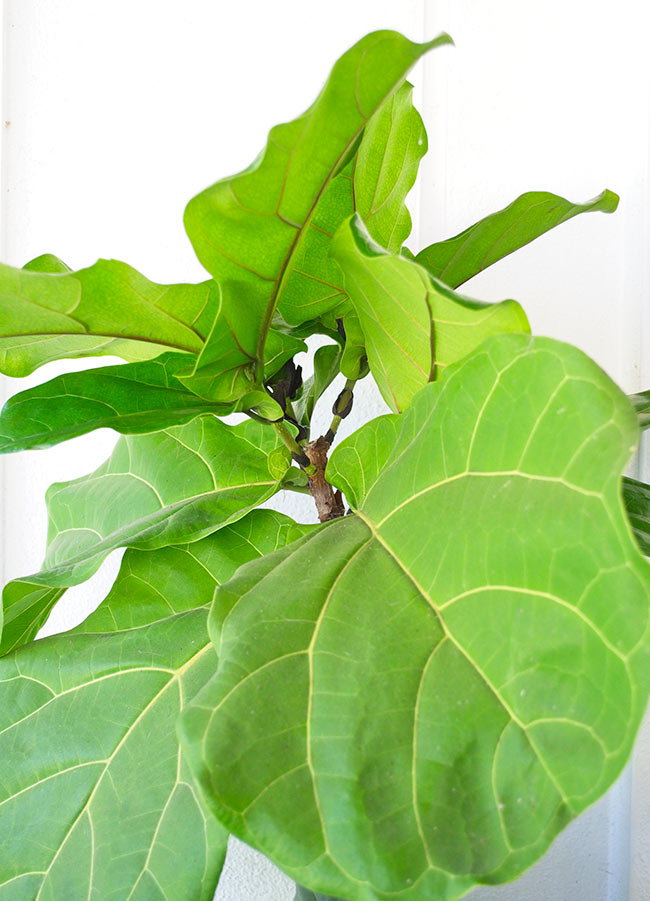
Isn’t it crazy how fast those leaves grew and how big they got in just 2 weeks? It totally blows my mind every time I look at them.
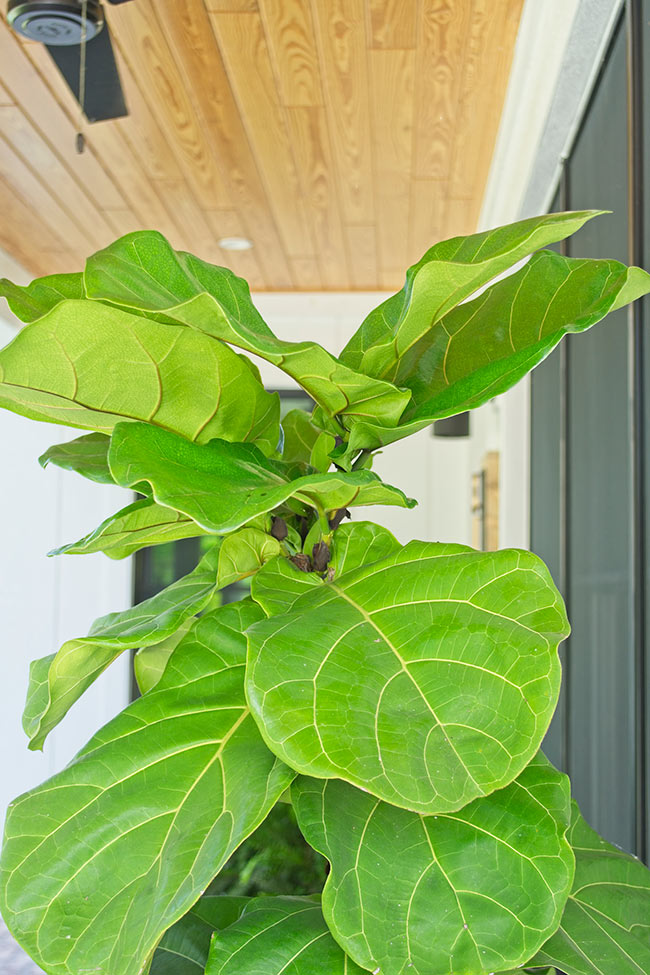
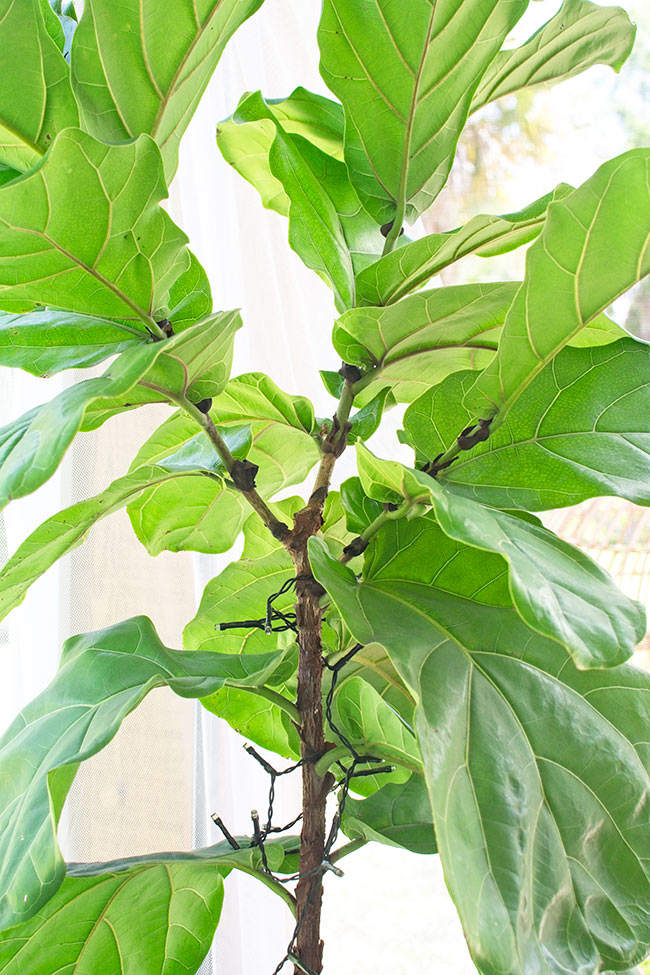
Below is another one of my Fiddles from which I made a cutting. You can see the three branches grew right from where I made the cut. I prefer my Fiddles to have “hairy legs” so I don’t pluck the leaves from the bottom part of the trunk. But you can certainly pull the leaves from the trunk to shape it into the tree you typically see plastered all over Instagram and Pinterest.
I put tiny battery-powered twinkle lights from Target on this tree and it looks so beautiful all lit up at night on our back porch. It’s an easy (and super inexpensive) way to add an instant magical ambiance to your outdoor space.
 \
\
Have you tried making your own Fiddle babies yet? If so, I’d love to hear all about your experience, positive or negative (but hopefully, positive!).
Thank you so much for following my blog and for letting me help you create your own lived-in, loved-in spaces!